Progressive Delivery Using Flagger Enterprise
Built upon the core tenets of continuous integration and continuous delivery (CI/CD), progressive delivery involves gradually rolling out features to small groups of select users to balance performance with speed. Developers and DevOps teams use fine-grained controls to minimize the risks of pushing new features to the production environment. If the newly released feature proves to be stable and performant, it can then be released to all users.
Flagger is a progressive delivery operator for Kubernetes and part of the Flux family of open source projects. It reduces the risk of introducing new software versions and automates production releases to improve your time to delivery. Flagger implements deployment strategies—canary releases, A/B testing, Blue/Green mirroring—using a service mesh (App Mesh, Istio, Linkerd, Kuma, Open Service Mesh) or an ingress controller (Contour, Gloo, NGINX, Skipper, Traefik, APISIX) for traffic routing. For release analysis, Flagger can query Prometheus, InfluxDB, Datadog, New Relic, CloudWatch, Stackdriver, or Graphite. For alerting it uses Slack, MS Teams, Discord, and Rocket. Using Flux allows us to manage our cluster applications in a declarative way through changes in a Git repository.
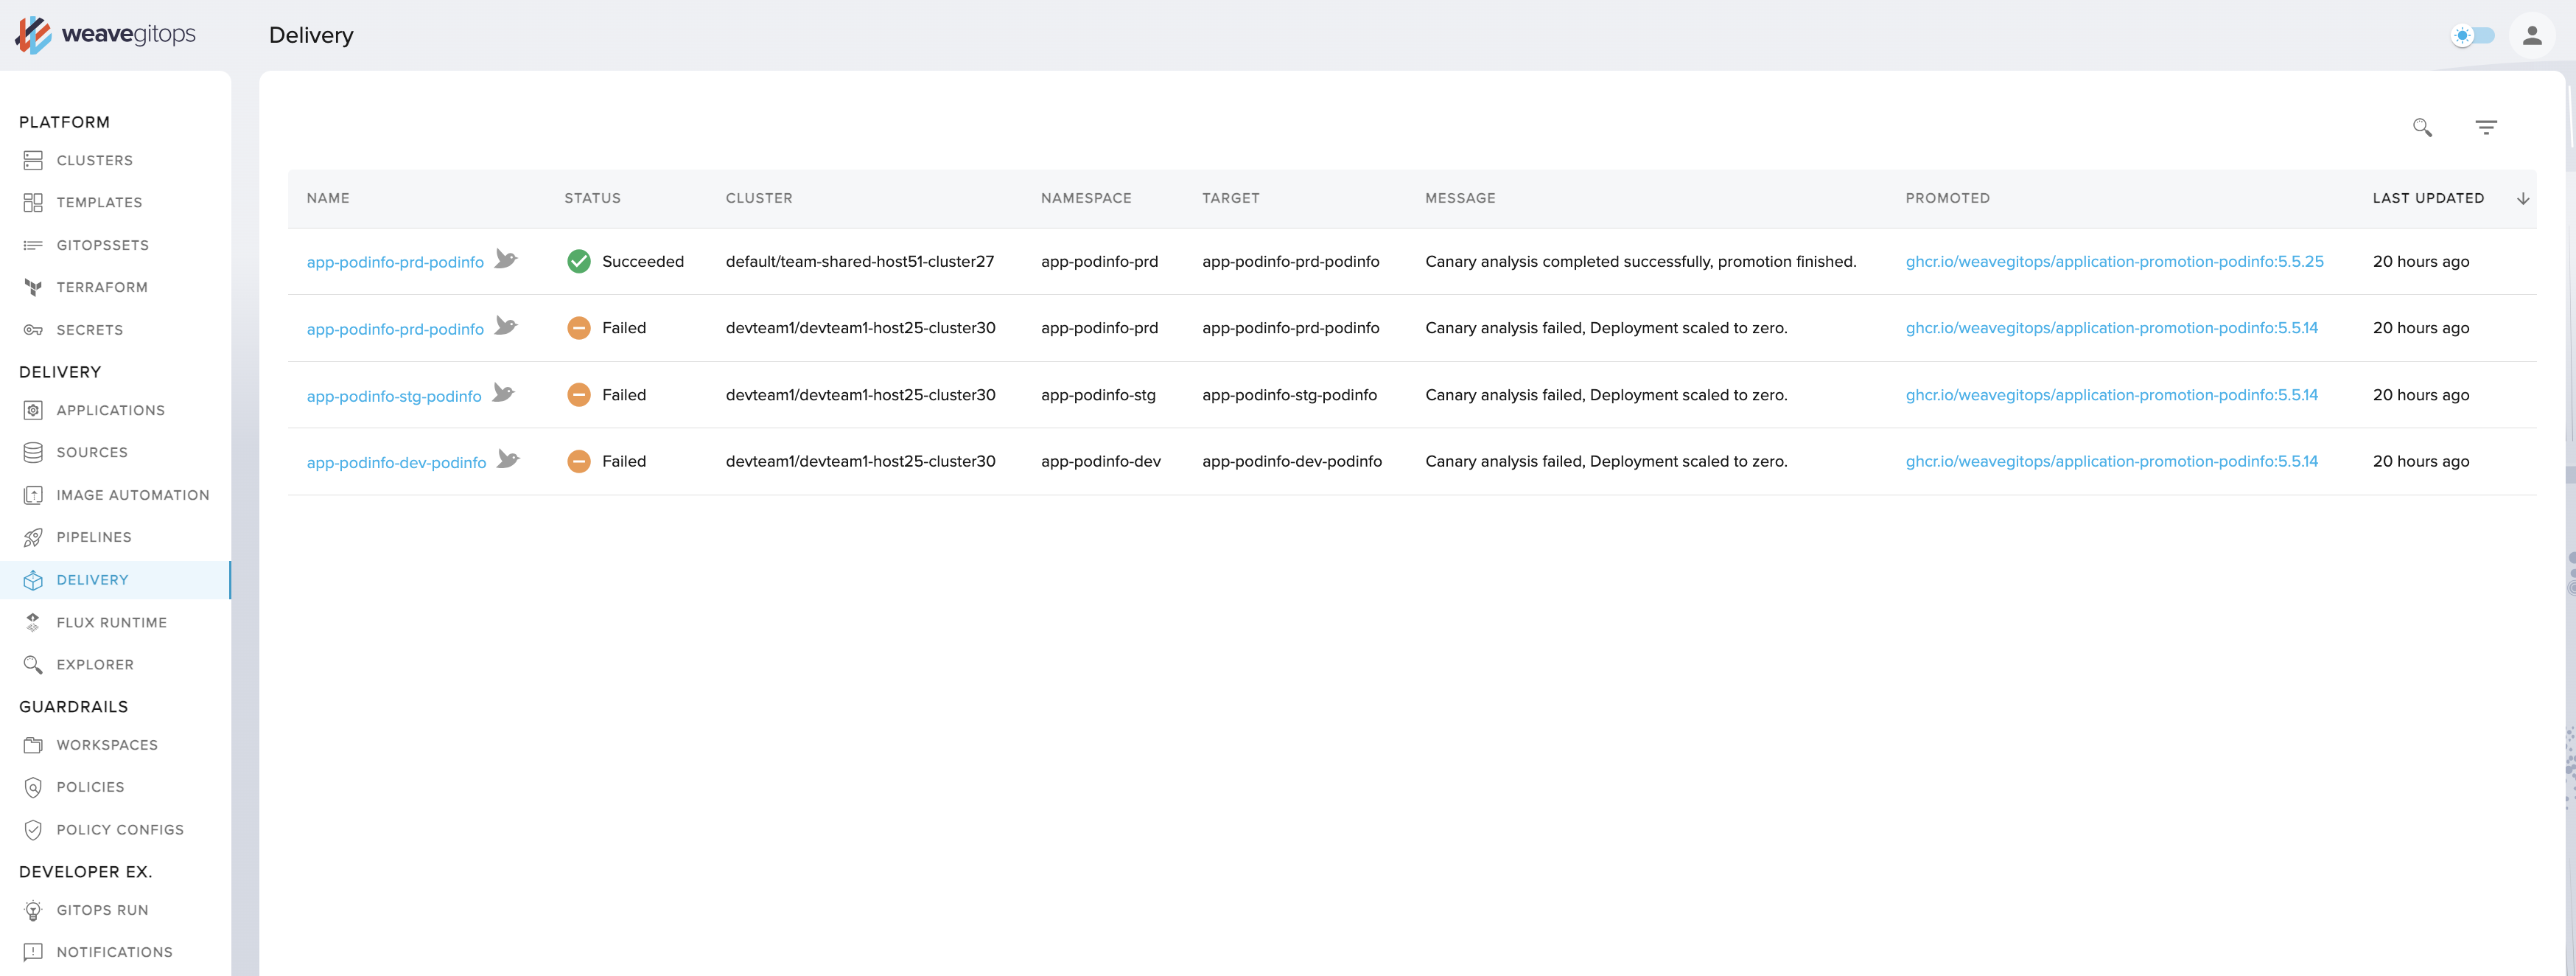
If you're using Weave GitOps Enterprise, the Applications > Delivery view of the UI provides an "at a glance" view so that you can understand the status of your progressive delivery rollouts across a fleet of connected clusters. This removes the cognitive overhead of having to know which objects to query and where they are located. You can also drill down into each rollout to understand its status and configuration, and view near-to-realtime data on any summary or details page. Lastly, it includes a flagger-nginx Profile to help you quickly get started without having to configure a service mesh.

How to use WGE's progressive delivery offering:
- if you don’t have Flagger installed on any clusters, you'll receive an onboarding message about installing it
- click on the delivery tab on the menu bar to retrieve a table view of canaries with key summary information regarding their location and state
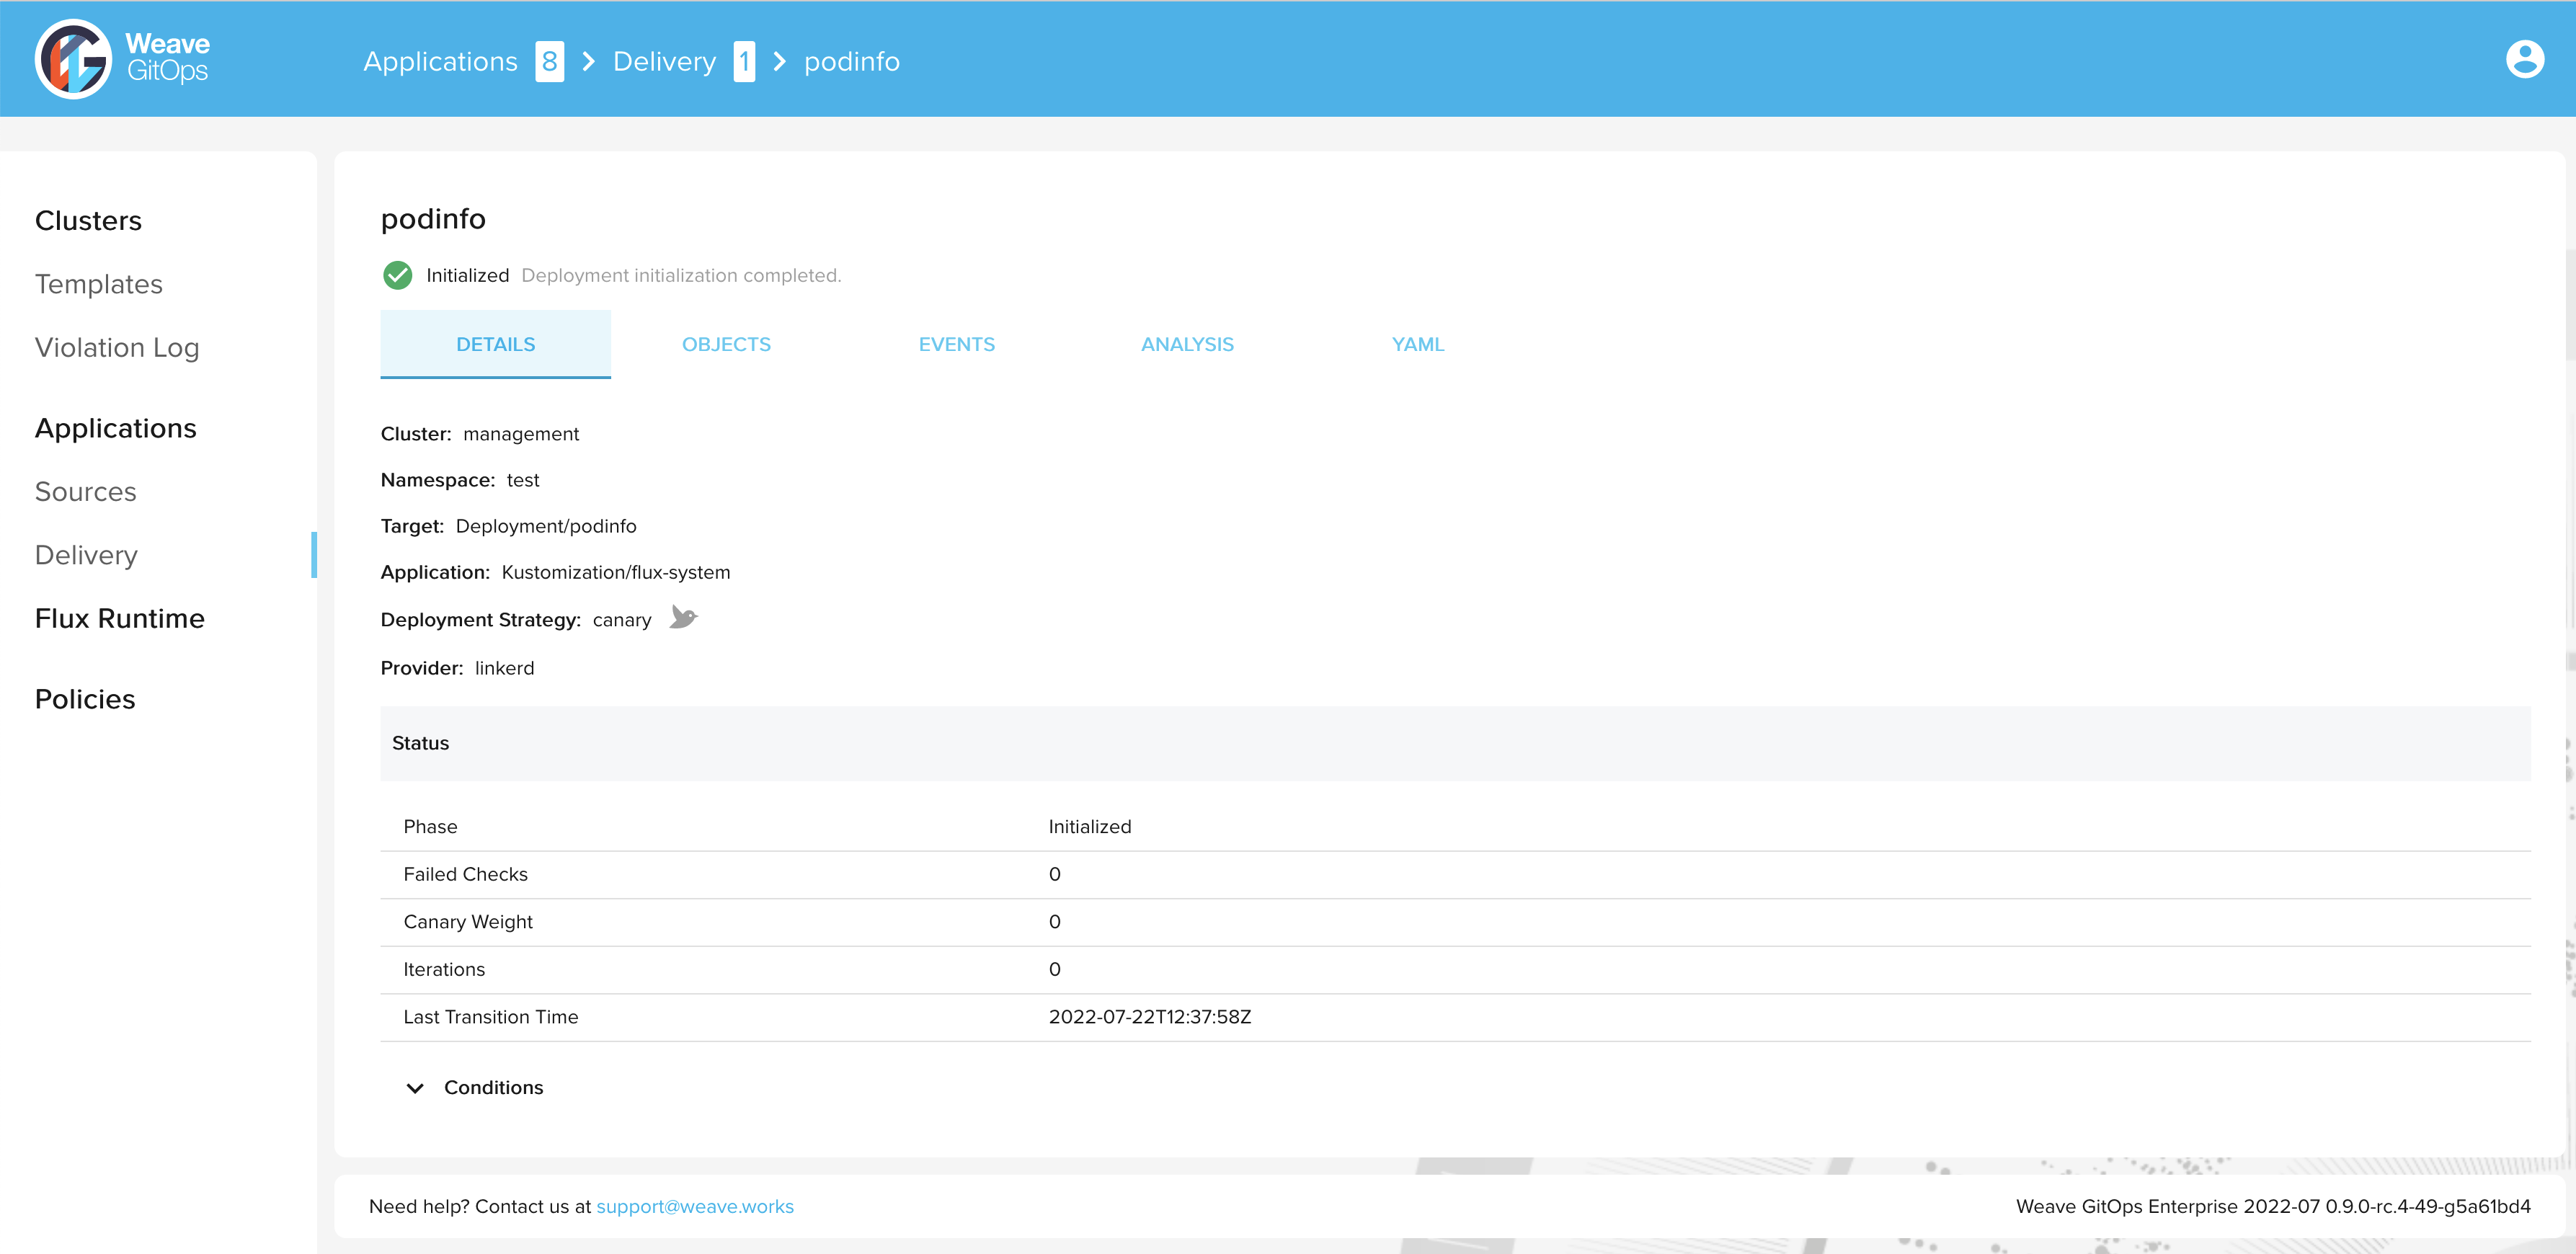
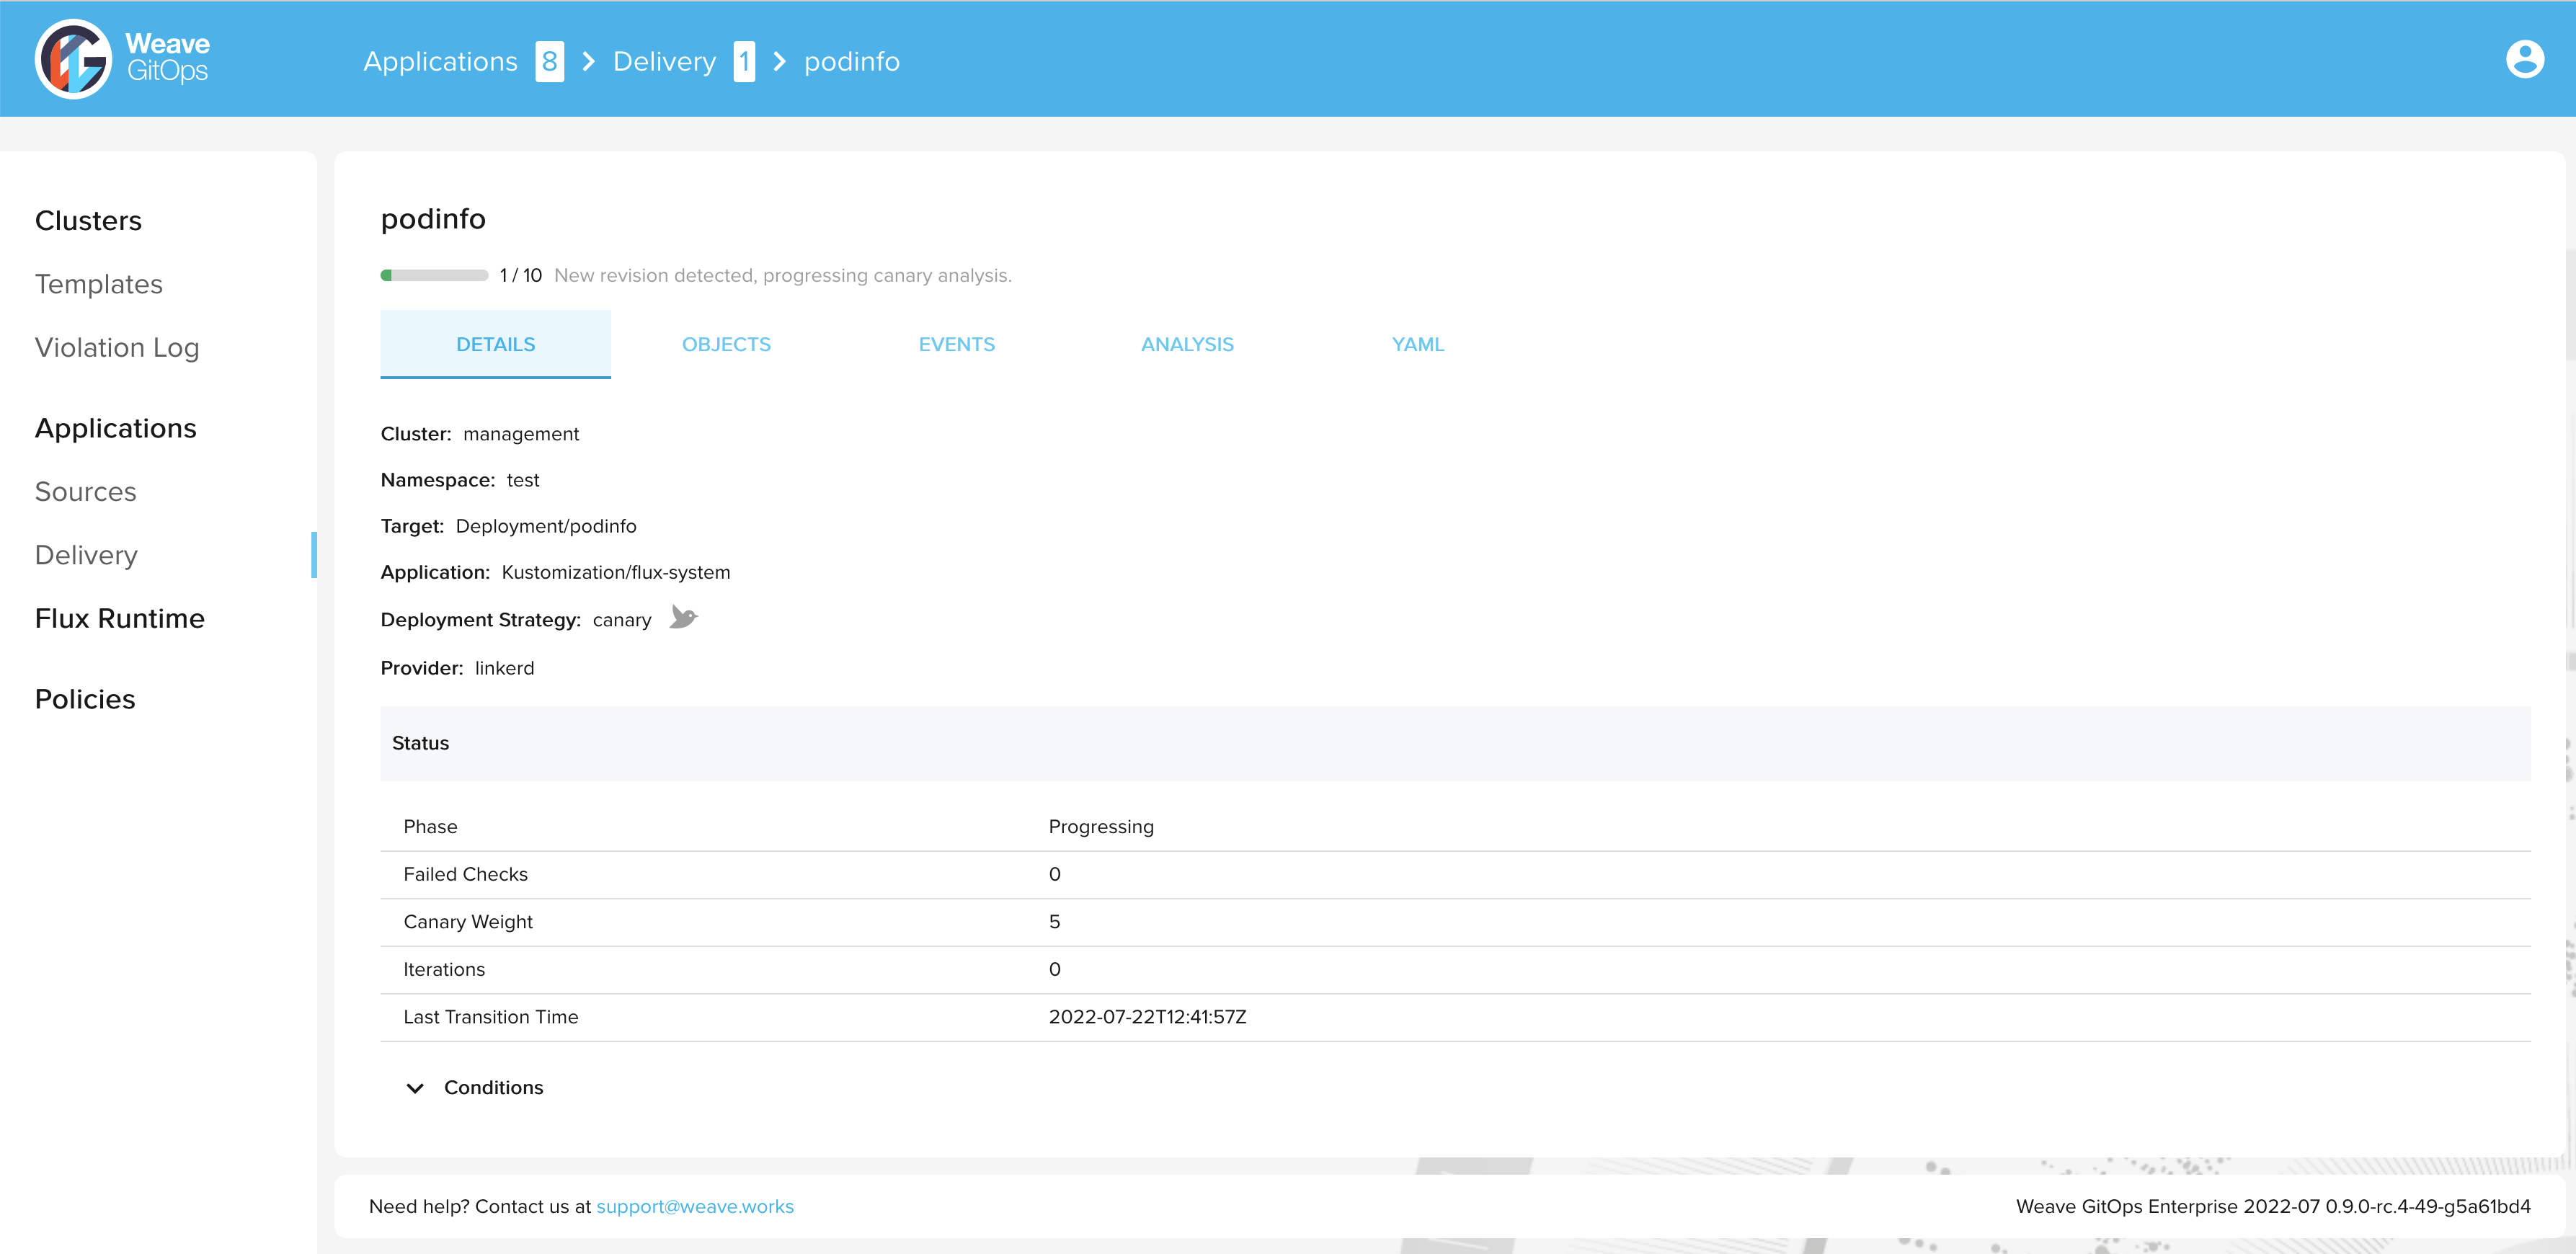
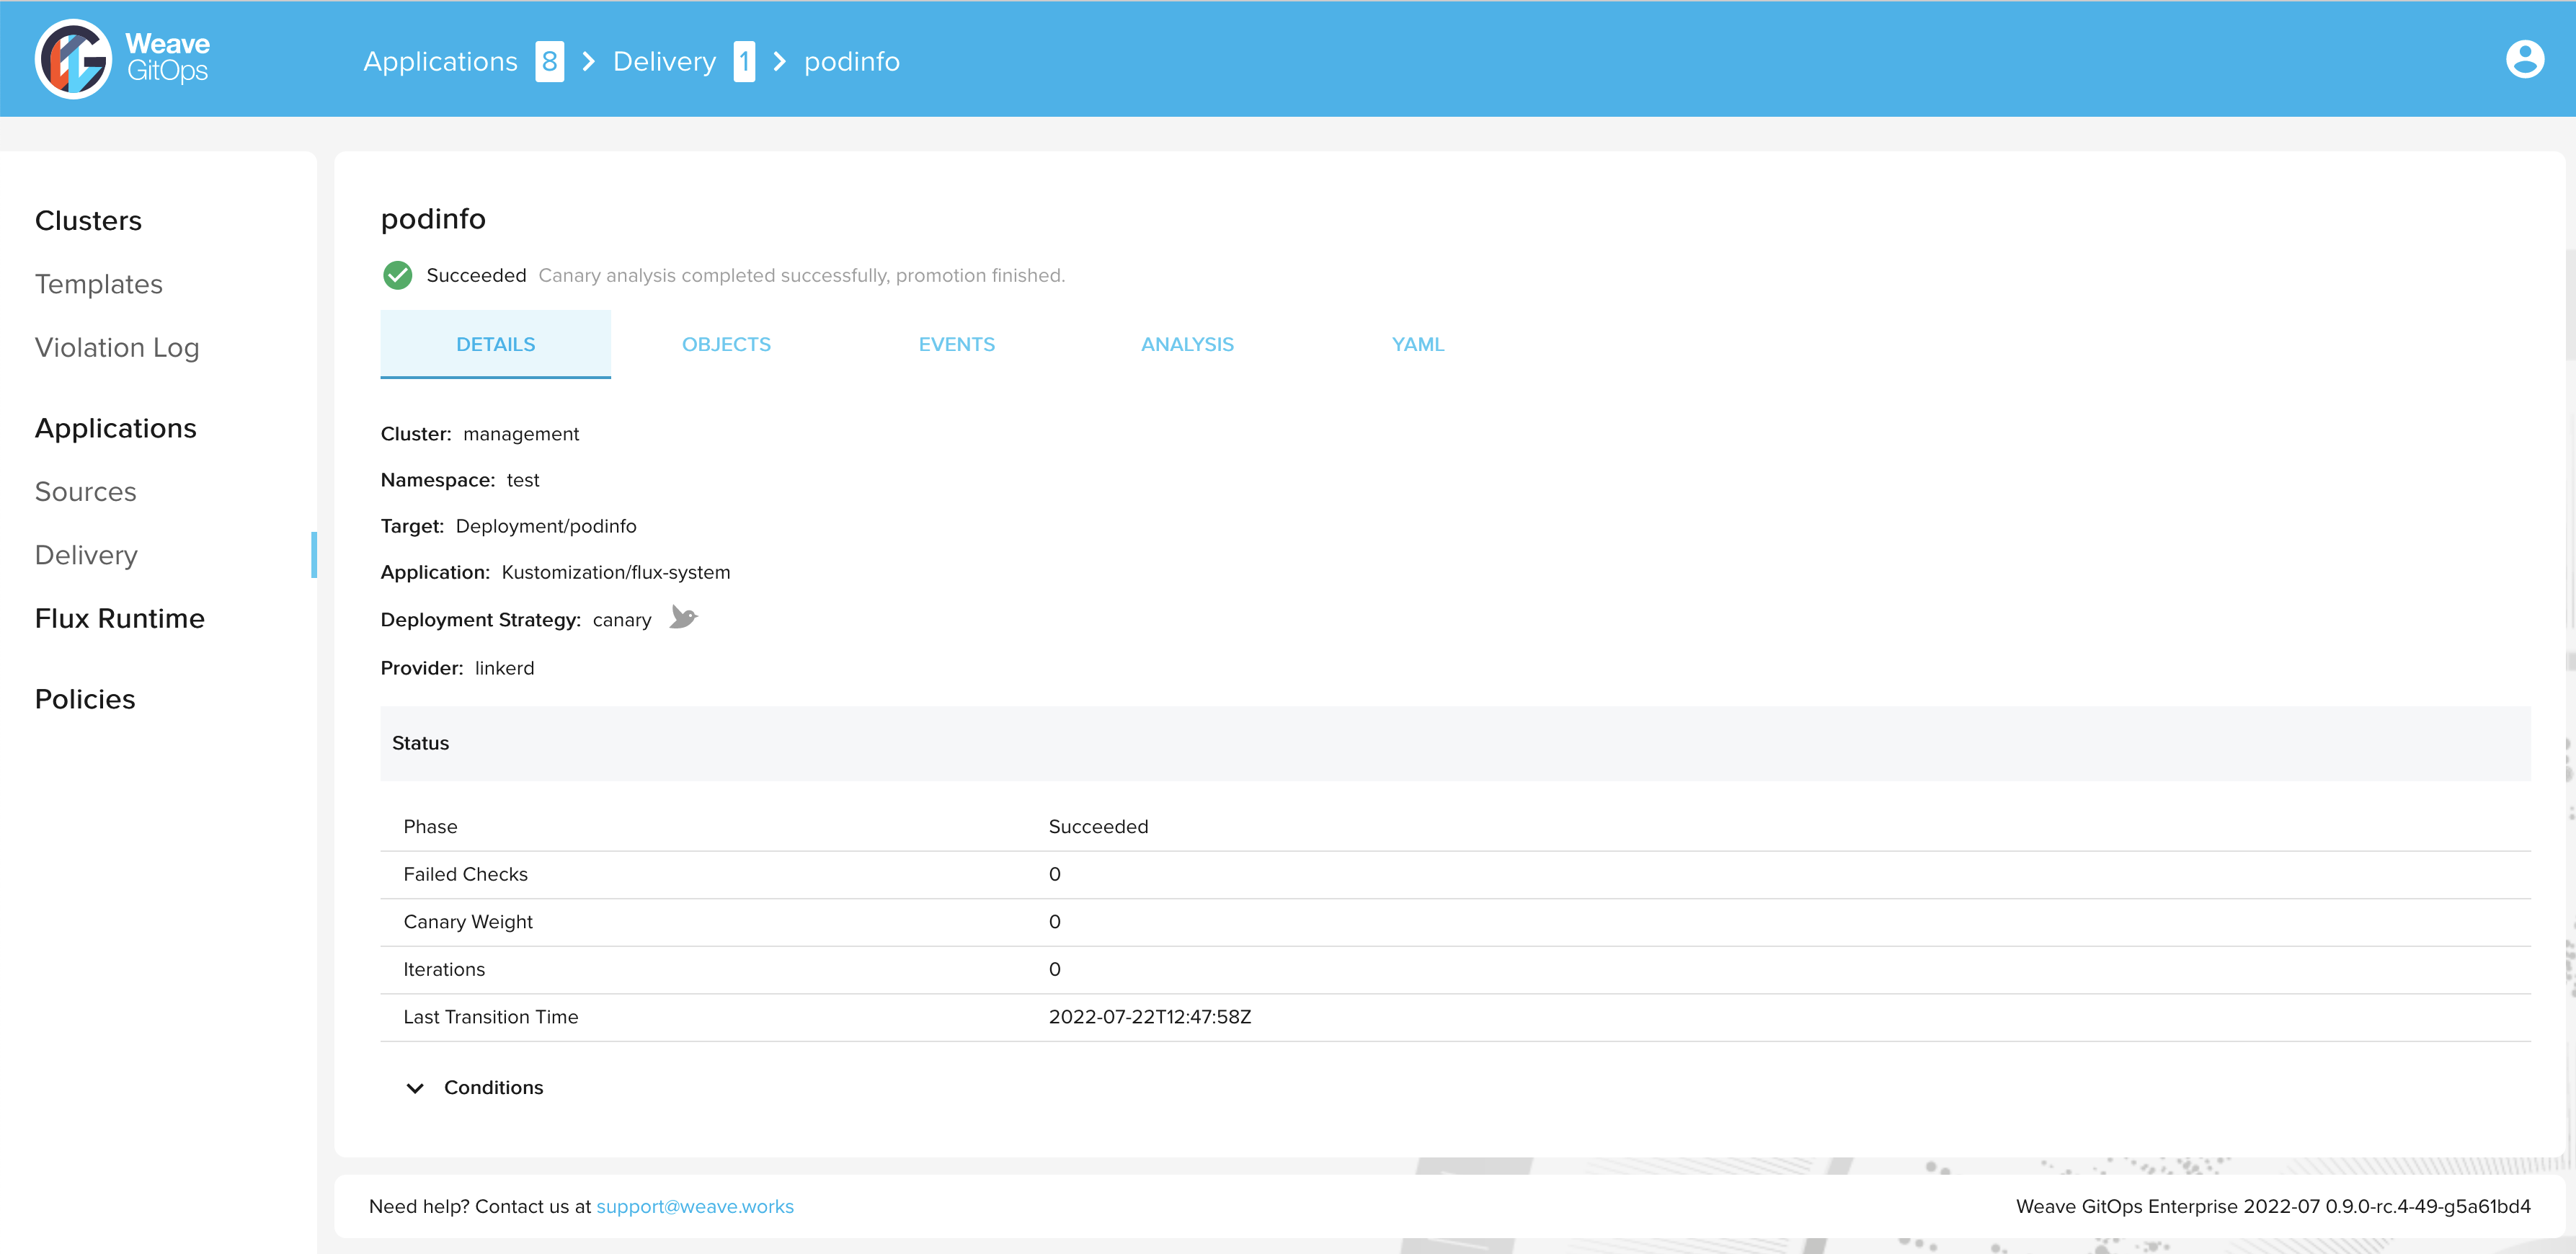
- click on a canary to see more detailed information about status, gates, and other elements
- click on the events tab on the detail page to see the most recent Kubernetes events for that canary and learn more about deployment history
- click on the yaml tab on the detail page to see the raw yaml of the canary
- view objects from any cluster/namespace that you have the appropriate permissions for, and nothing else
- if you choose, enable the progressive delivery feature through a feature flag
Supported deployment strategies include:
Canary Release: the user gradually shifts traffic to
a new version of an application and assesses performance—either promoting the release or abandoning it, based on performance.
A/B Testing: uses HTTP headers or cookies to ensure users remain on the same version of an application during a canary analysis.
Blue/Green: Traffic is switched from the current application to a new version based on the success of testing.
Blue/Green with Traffic Mirroring: sends copies of incoming requests to the new version of an application. The user receives the response from the current application and the other is discarded. The new version is promoted only if metrics are healthy.
This guide uses Flux manifests to install Flagger and Linkerd, a CNCF project and service mesh for Kubernetes and beyond. We will walk you through a full end-to-end scenario where you will:
- Install the Linkerd service mesh
- Install Flagger
- Deploy a sample application using a canary release strategy based on metrics provided through Linkerd's in-built Prometheus instance
Prerequisites
- This guide assumes you already have a Kubernetes cluster running and have bootstrapped Flux. To apply the manifests listed here, you will need to commit them to a repository being reconciled with Flux.
- Flagger requires the
autoscaling/v2orautoscaling/v2beta2API to be installed on your cluster. You can usekubectl api-resourcesto check which API versions are supported. - The step CLI installed to generate certificates that support mTLS connections.
Installing Linkerd Using Flux
To install Linkerd we'll use a Kustomization file. It will allow us to specify the order and default namespace for the installed resources, and to generate Secrets from certificate files via the use of a secretGenerator.
To support mTLS connections between meshed pods, Linkerd requires a trust anchor
certificate and an issuer certificate with its corresponding key. These certificates are
automatically created via the linkerd install command. However, when using a Helm chart to
install Linkerd, you must provide these certificates deliberately. The step CLI, listed above, allows us to generate these
certificates.
To generate the trust anchor certificate, run:
step certificate create root.linkerd.cluster.local ca.crt ca.key \
--profile root-ca --no-password --insecure
To generate the issuer certificate, run:
step certificate create identity.linkerd.cluster.local issuer.crt issuer.key \
--profile intermediate-ca --not-after 8760h --no-password --insecure \
--ca ca.crt --ca-key ca.key
Add the ca.crt, issuer.crt, and issuer.key files to the cluster repository under a linkerd
directory.
Let's add the three manifests for Linkerd components under the ./linkerd directory:
- A
Namespaceresource to control where the components are installed - A
HelmRepositoryresource to make the Linkerd Helm repo available on the cluster - A
HelmReleaseresource to install the latest version of Linkerd from theHelmRepository
Expand to see and copy-paste the three Linkerd manifests to add
---
apiVersion: v1
kind: Namespace
metadata:
  name: linkerd
  labels:
    config.linkerd.io/admission-webhooks: disabled
---
apiVersion: source.toolkit.fluxcd.io/v1beta2
kind: HelmRepository
metadata:
  name: linkerd
spec:
  interval: 1h
  url: https://helm.linkerd.io/stable
The value for the spec.values.identity.issuer.crtExpiry field below depends on the parameter value
used during the creation of the issuer certificate. In this example, it should be set to
one year from the certificate creation.
---
apiVersion: helm.toolkit.fluxcd.io/v2beta1
kind: HelmRelease
metadata:
  name: linkerd
spec:
  interval: 10m
  chart:
    spec:
      chart: linkerd2
      reconcileStrategy: ChartVersion
      sourceRef:
        kind: HelmRepository
        name: linkerd
  install:
    crds: Create
  upgrade:
    crds: CreateReplace
  valuesFrom:
    - kind: Secret
      name: linkerd-certs
      valuesKey: ca.crt
      targetPath: identityTrustAnchorsPEM
    - kind: Secret
      name: linkerd-certs
      valuesKey: issuer.crt
      targetPath: identity.issuer.tls.crtPEM
    - kind: Secret
      name: linkerd-certs
      valuesKey: issuer.key
      targetPath: identity.issuer.tls.keyPEM
  values:
    installNamespace: false
    identity:
      issuer:
        crtExpiry: "2023-07-18T20:00:00Z" # Change this to match generated certificate expiry date
---
apiVersion: helm.toolkit.fluxcd.io/v2beta1
kind: HelmRelease
metadata:
  name: linkerd-viz
spec:
  interval: 10m
  dependsOn:
    - name: linkerd
  chart:
    spec:
      chart: linkerd-viz
      reconcileStrategy: ChartVersion
      sourceRef:
        kind: HelmRepository
        name: linkerd
Next, add the following manifests. The first file instructs Kustomize to patch any Secrets that are referenced in
HelmRelease manifests. The second file is a Kustomization that references all the
other linkerd resource files.
Expand to see the Linkerd Kustomization manifests
nameReference:
  - kind: Secret
    version: v1
    fieldSpecs:
      - path: spec/valuesFrom/name
        kind: HelmRelease
---
apiVersion: kustomize.config.k8s.io/v1beta1
kind: Kustomization
namespace: linkerd
configurations:
- kustomizeconfig.yaml
resources:
- namespace.yaml
- source.yaml
- releases.yaml
secretGenerator:
  - name: linkerd-certs
    files:
      - ca.crt
      - issuer.crt
      - issuer.key
The secretGenerator generates Secrets from the files you've just created.
At this point the linkerd directory in your cluster repository should look like this:
> tree linkerd
linkerd
├── ca.crt
├── issuer.crt
├── issuer.key
├── kustomization.yaml
├── kustomizeconfig.yaml
├── namespace.yaml
├── releases.yaml
└── source.yaml
Once Flux reconciles this directory to the cluster, Linkerd should be installed.
Before proceeding to the next step, check that all the Linkerd pods have started successfully:
> kubectl get pods -n linkerd
NAME                                      READY   STATUS    RESTARTS   AGE
linkerd-destination-66d5668b-4mw49        4/4     Running   0          10m
linkerd-identity-6b4658c74b-6nc97         2/2     Running   0          10m
linkerd-proxy-injector-6b76789cb4-8vqj4   2/2     Running   0          10m

> kubectl get pods -n linkerd-viz
NAME                            READY   STATUS    RESTARTS   AGE
grafana-db56d7cb4-xlnn4         2/2     Running   0          10m
metrics-api-595c7b564-724ps     2/2     Running   0          10m
prometheus-5d4dffff55-8fscd     2/2     Running   0          10m
tap-6dcb89d487-5ns8n            2/2     Running   0          10m
tap-injector-54895654bb-9xn7k   2/2     Running   0          10m
web-6b6f65dbc7-wltdg            2/2     Running   0          10m
Any new directories that you add to the cluster repository while following this guide must be included in a path that Flux reconciles.
Installing Flagger Using Flux
To install Flagger, you'll use a Kustomization file that will define the installation order and provide a default namespace for the installed resources.
Create a new flagger directory. Make sure to locate it under a repository path that Flux reconciles.
Now add under this directory the three resource manifests for Flagger:
- A
Namespaceresource to control where the components are installed - A
HelmRepositoryresource to make the Flagger Helm repo available on the cluster - A
HelmReleaseresource to install the latest version of Flagger and the load tester app (which generates synthetic traffic during the analysis phase), from thatHelmRepository
Expand to see the three Flagger resource manifests
---
apiVersion: v1
kind: Namespace
metadata:
  name: flagger
---
apiVersion: source.toolkit.fluxcd.io/v1beta2
kind: HelmRepository
metadata:
  name: flagger
spec:
  interval: 1h
  url: https://flagger.app
---
apiVersion: helm.toolkit.fluxcd.io/v2beta1
kind: HelmRelease
metadata:
  name: flagger
spec:
  releaseName: flagger
  install:
    crds: Create
  upgrade:
    crds: CreateReplace
  interval: 10m
  chart:
    spec:
      chart: flagger
      reconcileStrategy: ChartVersion
      sourceRef:
        kind: HelmRepository
        name: flagger
  values:
    metricsServer: http://prometheus.linkerd-viz:9090
    meshProvider: linkerd
---
apiVersion: helm.toolkit.fluxcd.io/v2beta1
kind: HelmRelease
metadata:
  name: loadtester
spec:
  interval: 10m
  chart:
    spec:
      chart: loadtester
      reconcileStrategy: ChartVersion
      sourceRef:
        kind: HelmRepository
        name: flagger
Now add the following Kustomization file. It references all of the previous files that you've added:
Expand to see the Flagger Kustomization manifest
---
apiVersion: kustomize.config.k8s.io/v1beta1
kind: Kustomization
namespace: flagger
resources:
- namespace.yaml
- source.yaml
- releases.yaml
The flagger directory in the cluster repository should look like this:
> tree flagger
flagger
├── kustomization.yaml
├── namespace.yaml
├── releases.yaml
└── source.yaml
Once Flux reconciles this directory to the cluster, Flagger and the load tester app should be installed.
Before proceeding to the next step, check that all of your Flagger pods have started successfully:
> kubectl get pods -n flagger
NAME                          READY   STATUS    RESTARTS   AGE
flagger-7d456d4fc7-knf2g      1/1     Running   0          4m
loadtester-855b4d77f6-scl6r   1/1     Running   0          4m
Deploy a Canary Release
To demonstrate the progressive rollout of an application, we'll use a tiny sample web app called podinfo and configure a canary release strategy.
In our example, Flagger will scale up a new version of podinfo (the canary) alongside the existing version (the primary). It will gradually increase traffic to the new version in increments of 5%, up to a maximum of 50%. Flagger will continuously monitor the new version for an acceptable request response rate and average request duration. Based on this analysis, Flagger will either update the primary to the new version or abandon the promotion, then scale the canary back down to zero.
Create a new test directory and add these three canary resource manifests under it:
- A
Namespaceresource to control where the components are installed - A
DeploymentandHorizontalPodAutoscalerfor thepodinfoapplication - A
Canaryresource which references theDeploymentandHorizontalPodAutoscalerresources
We don't need to define a service resource. This is specified within the canary definition and created by Flagger.
Expand to see the three canary resource manifests
---
apiVersion: v1
kind: Namespace
metadata:
  name: test
  annotations:
    linkerd.io/inject: enabled
---
apiVersion: apps/v1
kind: Deployment
metadata:
  name: podinfo
  labels:
    app: podinfo
spec:
  minReadySeconds: 5
  revisionHistoryLimit: 5
  progressDeadlineSeconds: 60
  strategy:
    rollingUpdate:
      maxUnavailable: 1
    type: RollingUpdate
  selector:
    matchLabels:
      app: podinfo
  template:
    metadata:
      annotations:
        prometheus.io/scrape: "true"
        prometheus.io/port: "9797"
      labels:
        app: podinfo
    spec:
      containers:
      - name: podinfod
        image: ghcr.io/stefanprodan/podinfo:6.1.8
        imagePullPolicy: IfNotPresent
        ports:
        - name: http
          containerPort: 9898
          protocol: TCP
        - name: http-metrics
          containerPort: 9797
          protocol: TCP
        - name: grpc
          containerPort: 9999
          protocol: TCP
        command:
        - ./podinfo
        - --port=9898
        - --port-metrics=9797
        - --grpc-port=9999
        - --grpc-service-name=podinfo
        - --level=info
        - --random-delay=false
        - --random-error=false
        env:
        - name: PODINFO_UI_COLOR
          value: "#34577c"
        livenessProbe:
          exec:
            command:
            - podcli
            - check
            - http
            - localhost:9898/healthz
          initialDelaySeconds: 5
          timeoutSeconds: 5
        readinessProbe:
          exec:
            command:
            - podcli
            - check
            - http
            - localhost:9898/readyz
          initialDelaySeconds: 5
          timeoutSeconds: 5
        resources:
          limits:
            cpu: 2000m
            memory: 512Mi
          requests:
            cpu: 100m
            memory: 64Mi

---
apiVersion: autoscaling/v2beta2
kind: HorizontalPodAutoscaler
metadata:
  name: podinfo
spec:
  scaleTargetRef:
    apiVersion: apps/v1
    kind: Deployment
    name: podinfo
  minReplicas: 2
  maxReplicas: 4
  metrics:
    - type: Resource
      resource:
        name: cpu
        target:
          type: Utilization
          # scale up if usage is above
          # 99% of the requested CPU (100m)
          averageUtilization: 99
---
apiVersion: flagger.app/v1beta1
kind: Canary
metadata:
  name: podinfo
spec:
  # deployment reference
  targetRef:
    apiVersion: apps/v1
    kind: Deployment
    name: podinfo
  # HPA reference (optional)
  autoscalerRef:
    apiVersion: autoscaling/v2beta2
    kind: HorizontalPodAutoscaler
    name: podinfo
  # the maximum time in seconds for the canary deployment
  # to make progress before it is rollback (default 600s)
  progressDeadlineSeconds: 60
  service:
    # ClusterIP port number
    port: 9898
    # container port number or name (optional)
    targetPort: 9898
  analysis:
    # schedule interval (default 60s)
    interval: 30s
    # max number of failed metric checks before rollback
    threshold: 5
    # max traffic percentage routed to canary
    # percentage (0-100)
    maxWeight: 50
    # canary increment step
    # percentage (0-100)
    stepWeight: 5
    # Linkerd Prometheus checks
    metrics:
    - name: request-success-rate
      # minimum req success rate (non 5xx responses)
      # percentage (0-100)
      thresholdRange:
        min: 99
      interval: 1m
    - name: request-duration
      # maximum req duration P99
      # milliseconds
      thresholdRange:
        max: 500
      interval: 30s
    # testing (optional)
    webhooks:
      - name: acceptance-test
        type: pre-rollout
        url: http://loadtester.flagger/
        timeout: 30s
        metadata:
          type: bash
          cmd: "curl -sd 'test' http://podinfo-canary.test:9898/token | grep token"
      - name: load-test
        type: rollout
        url: http://loadtester.flagger/
        metadata:
          cmd: "hey -z 2m -q 10 -c 2 http://podinfo-canary.test:9898/"
Add a Kustomization file to apply all resources to the test namespace:
Expand to see the Canary Kustomization manifest
---
apiVersion: kustomize.config.k8s.io/v1beta1
kind: Kustomization
namespace: test
resources:
- namespace.yaml
- deployment.yaml
- canary.yaml
At this point, the test directory in the cluster repository should look like this:
> tree test
test
├── canary.yaml
├── deployment.yaml
├── kustomization.yaml
└── namespace.yaml
After a short time, the status of the canary object should be set to Initialized:

> kubectl get canary podinfo -n test
NAME      STATUS        WEIGHT   LASTTRANSITIONTIME
podinfo   Initialized   0        2022-07-22T12:37:58Z
Trigger a new rollout by bumping the version of podinfo:
> kubectl set image deployment/podinfo podinfod=ghcr.io/stefanprodan/podinfo:6.0.1 -n test
During the progressive rollout, the canary object reports on its current status:

> kubectl get canary podinfo -n test
NAME      STATUS        WEIGHT   LASTTRANSITIONTIME
podinfo   Progressing   5       2022-07-22T12:41:57Z
After a short time the rollout is completed and the status of the canary object is set to
Succeeded:

> kubectl get canary podinfo -n test
NAME      STATUS      WEIGHT   LASTTRANSITIONTIME
podinfo   Succeeded   0        2022-07-22T12:47:58Z
Summary
Congratulations, you have now completed a progressive delivery rollout with Flagger and Linkerd! 🎉
Next steps:
- Explore more of what Flagger offers
- Configure manual approvals for progressive delivery deployments